This guide provides essential steps for effectively managing new applications, waitlisting, and sending enrollment packages within the Digital Childcare platform. It streamlines the admissions process, allowing users to easily track application statuses, communicate with families, and manage waitlists efficiently. By following this guide, childcare administrators can enhance their operational efficiency and ensure a smooth enrollment experience for both staff and families.
1. Navigate to https://app.mydigitalchildcare.com/dashboard
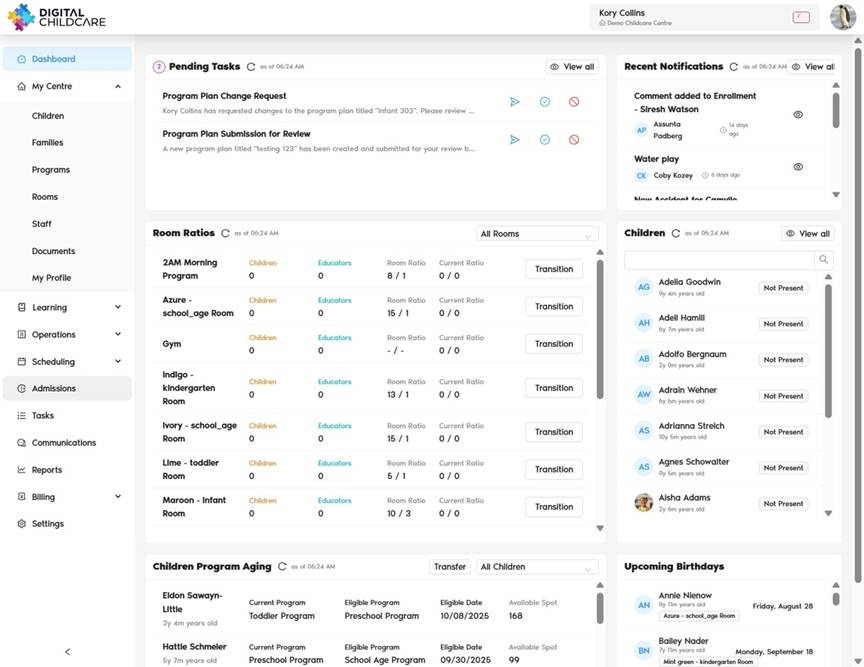
2. Click "Admissions"
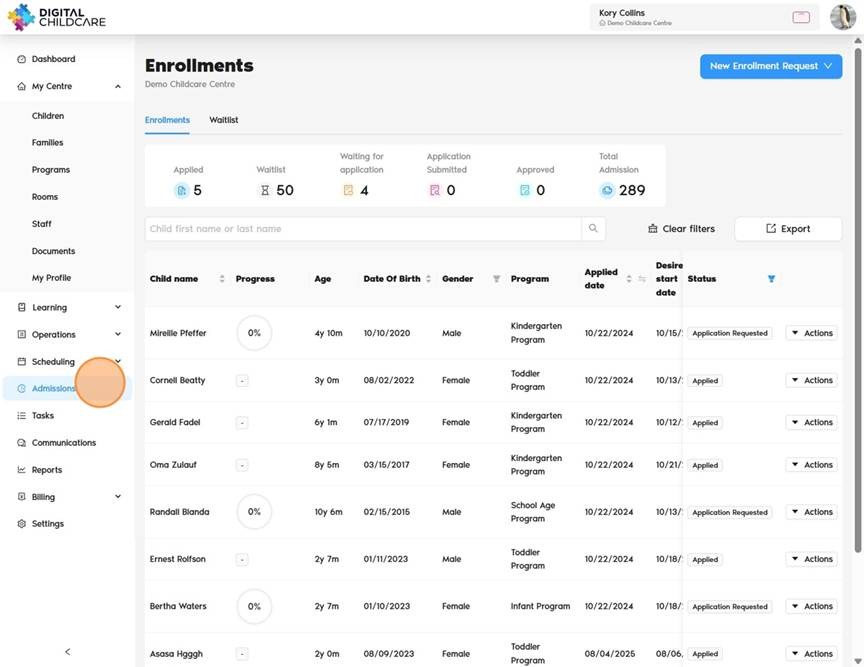
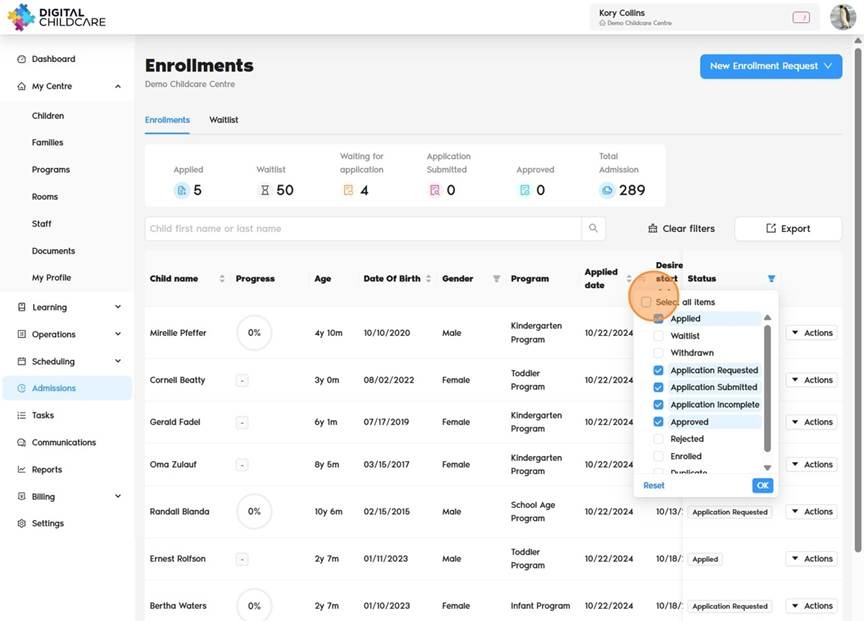
3. Click Filter to choose specific items or select "Select all items."
4. All new requests will have the status "Applied."
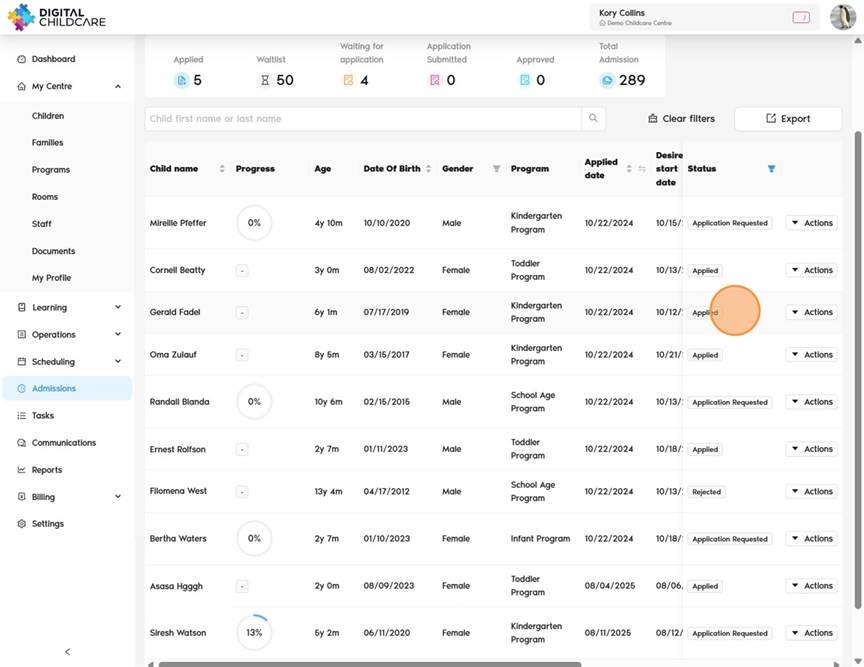
5. You can slide through this screen to get a quick view of the information.
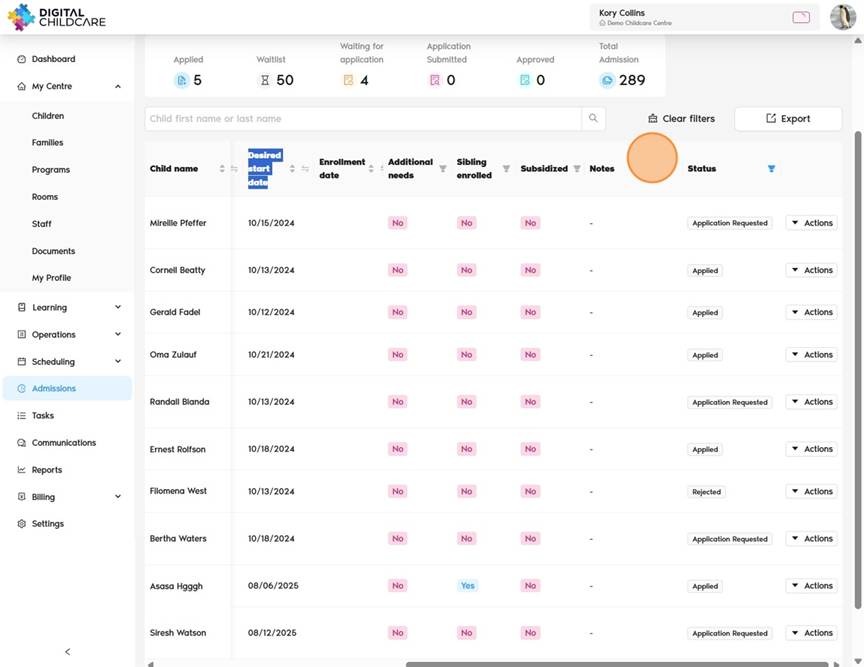
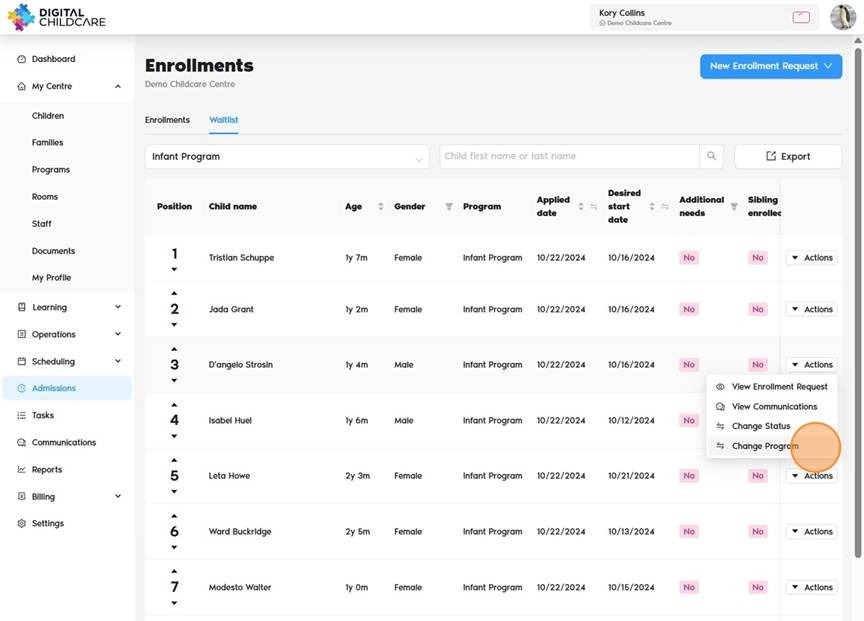
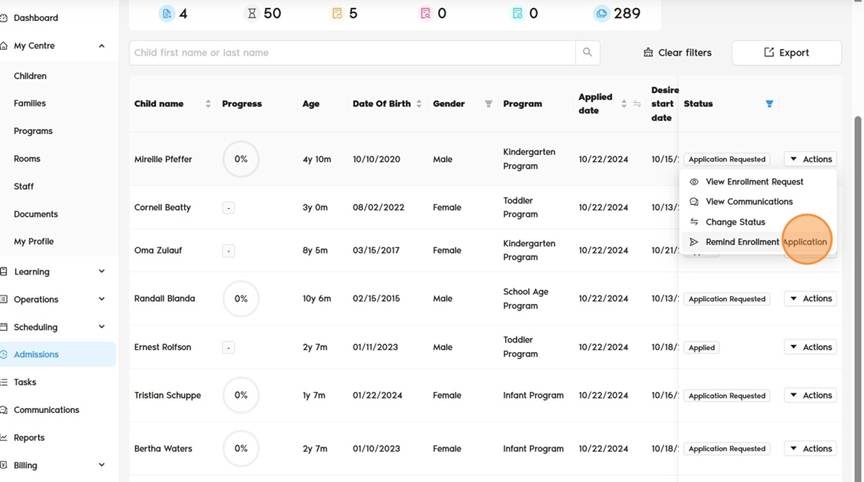
6. When you click "Actions," you can view the enrollment report, send or view communications, change status, or change the program.
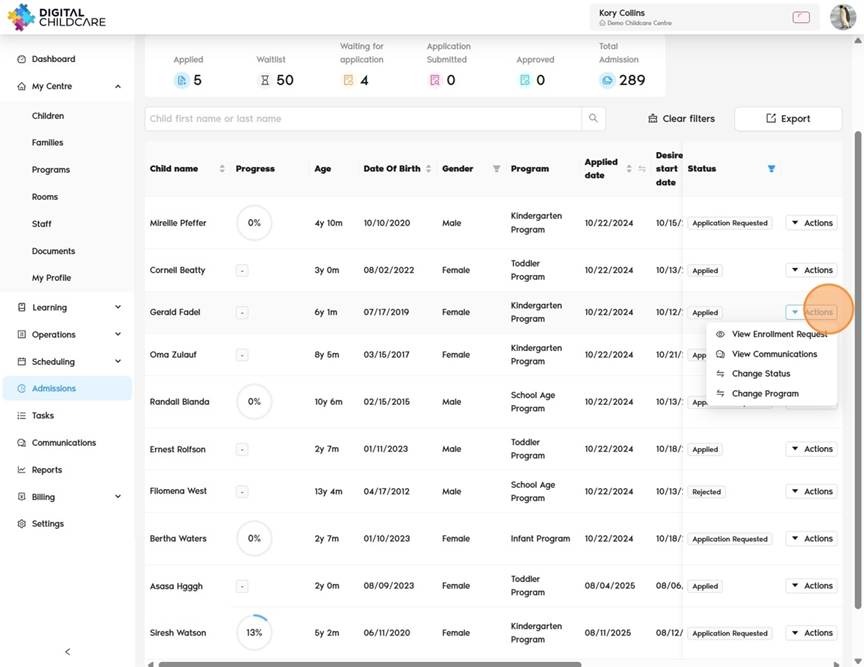
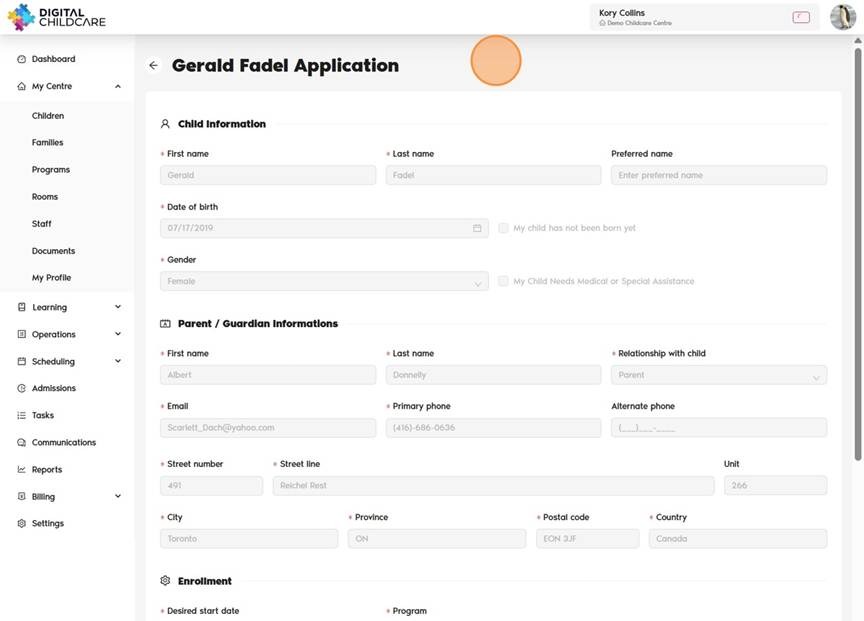
7. Click "View Enrollment Request" to see the full details.
8. Click "Change Status" to send the enrollment package, withdraw, or waitlist the child.
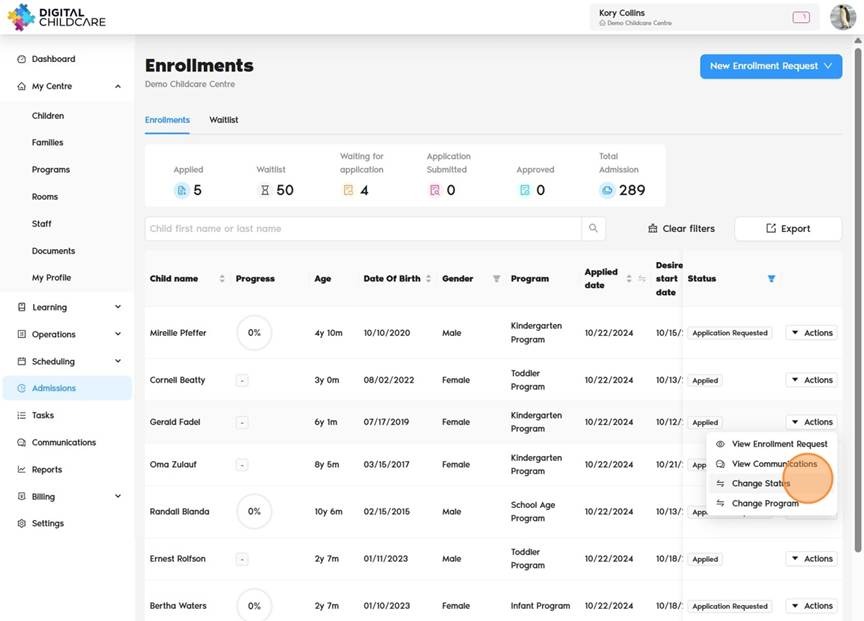
9. Change the status accordingly.
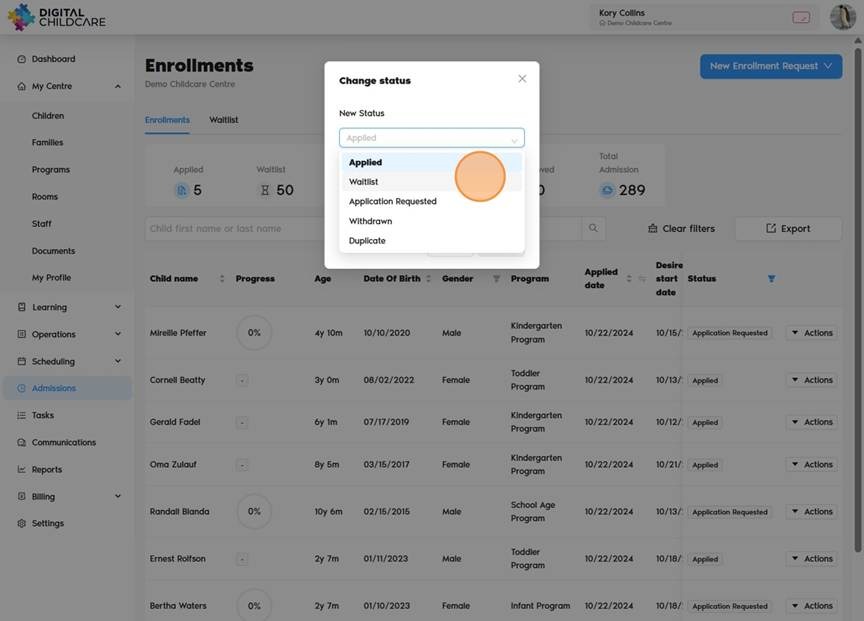
10. If no spot is available, move the child to the waitlist by clicking "Waitlist."
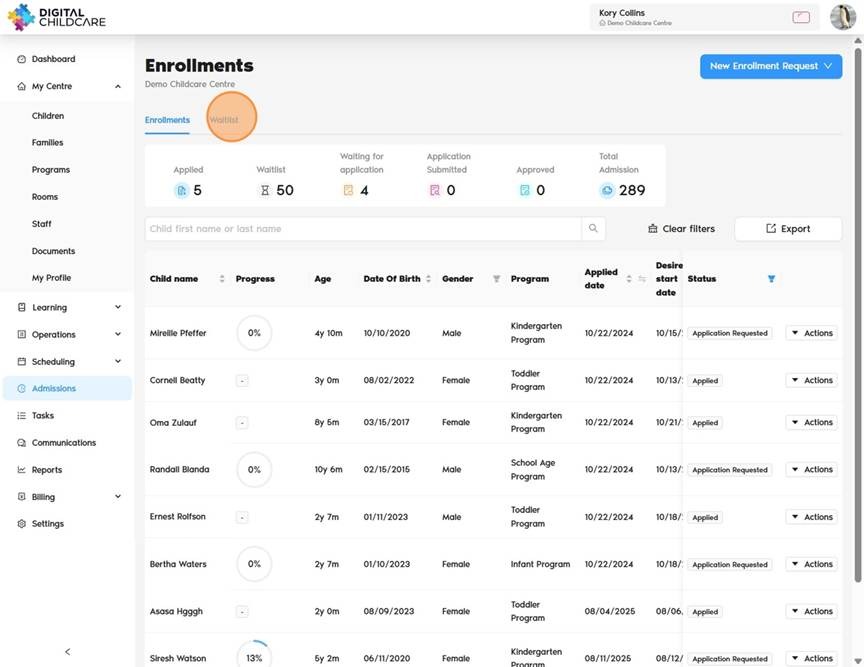
11. To keep track of waitlists, click on the "Waitlist" tab.
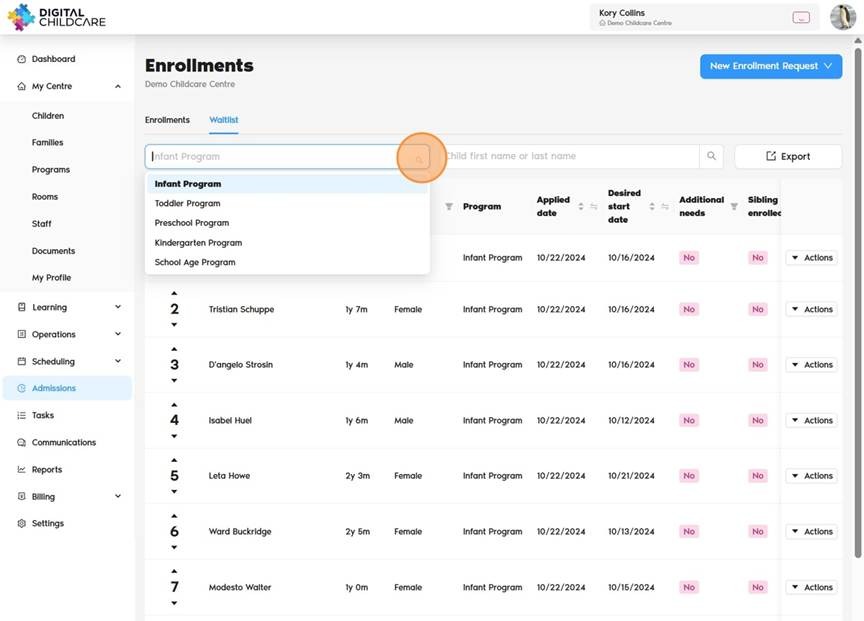
12. You can view the waitlist by program or search for a specific child.
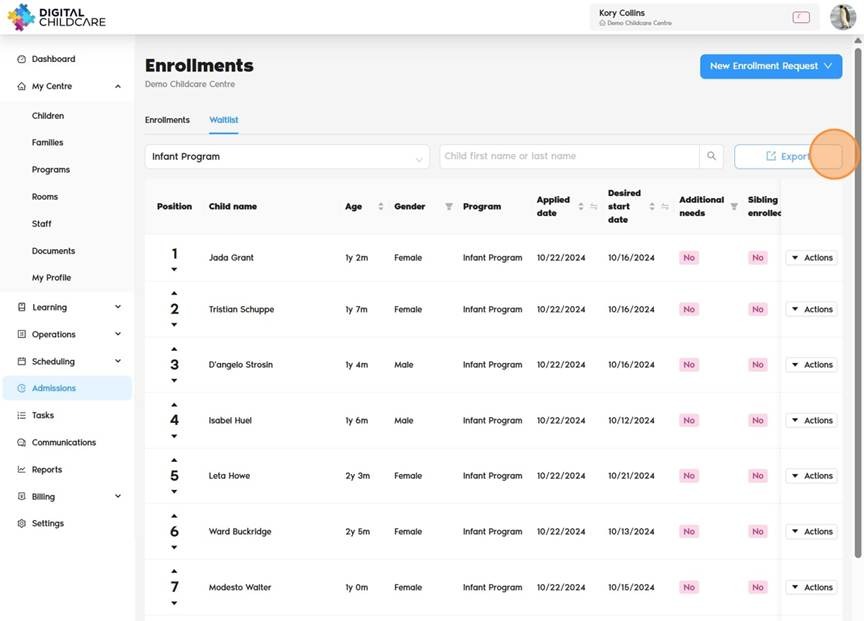
13. If you prefer, you can export the waitlist to Excel by clicking "Export."
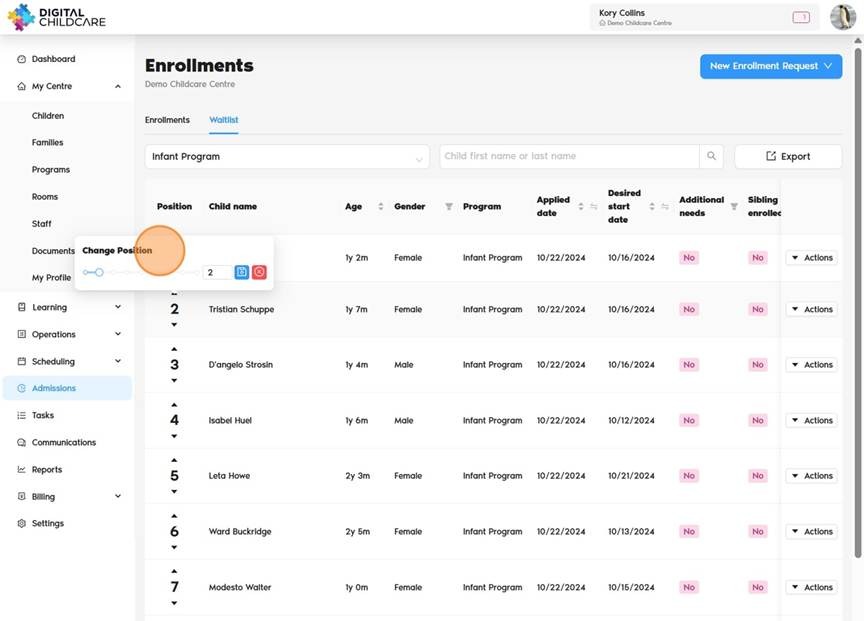
14. Click the number in the Position section to easily move a child up or down. Then click "Change Position."
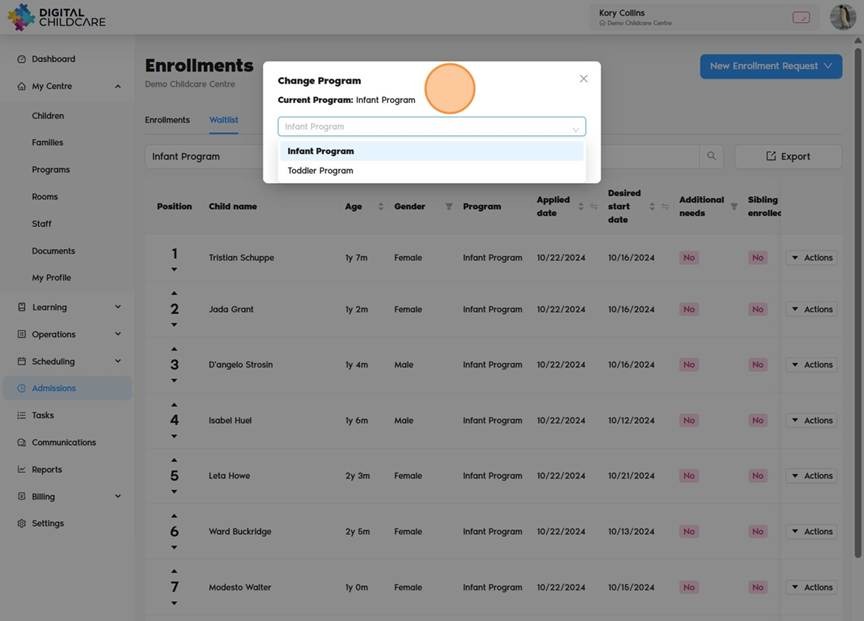
15. If the child’s information is outdated and you need to change their program, click "Change Program."
16. Once you click on "Change Program." The next available program based on the child’s age will appear.
17. If a spot becomes available, click "Change Status" and select "Application Requested."
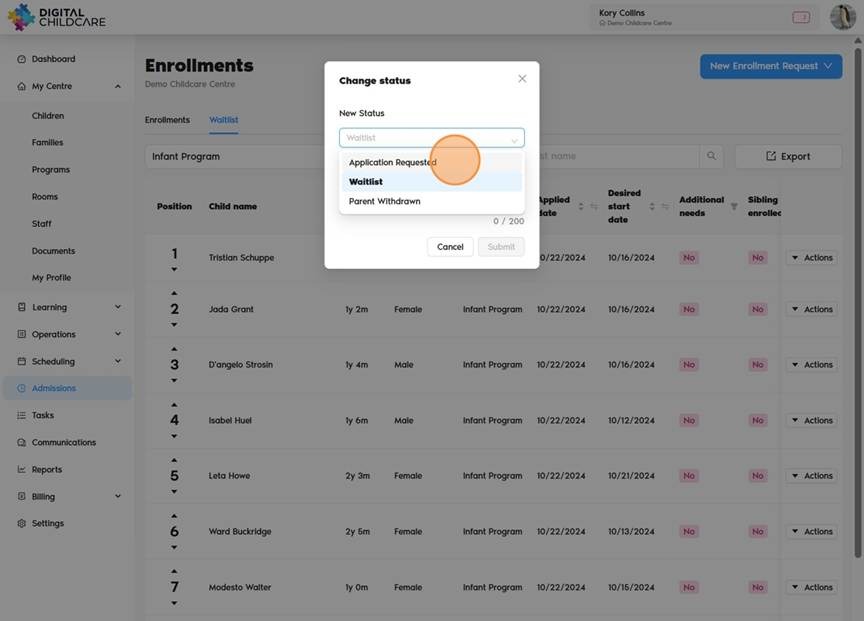
⚠️ Alert: Once complete, the enrollment package will be automatically sent to the parents for completion.
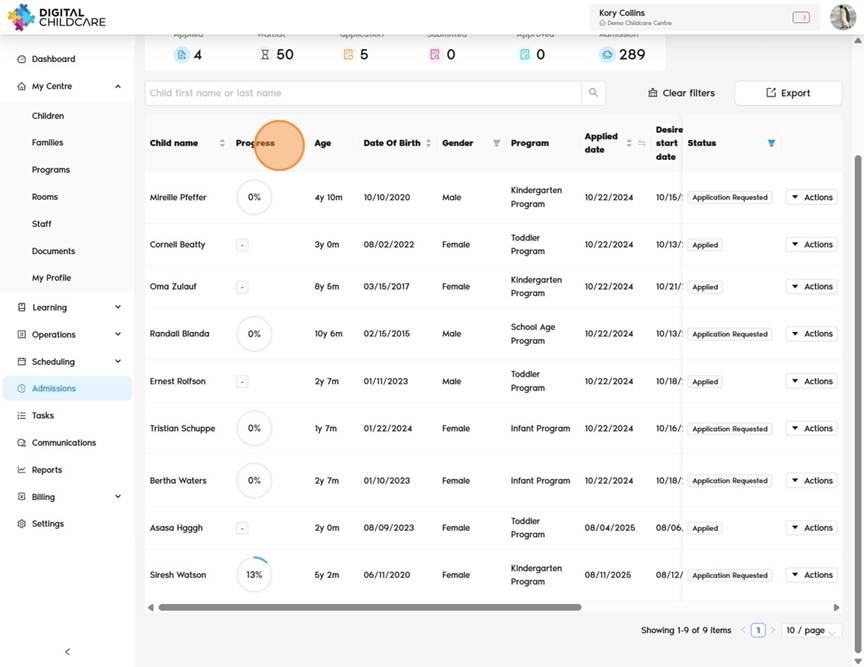
18. You can view their progress in the "Progress" section to see the percentage of the completed enrollment package.
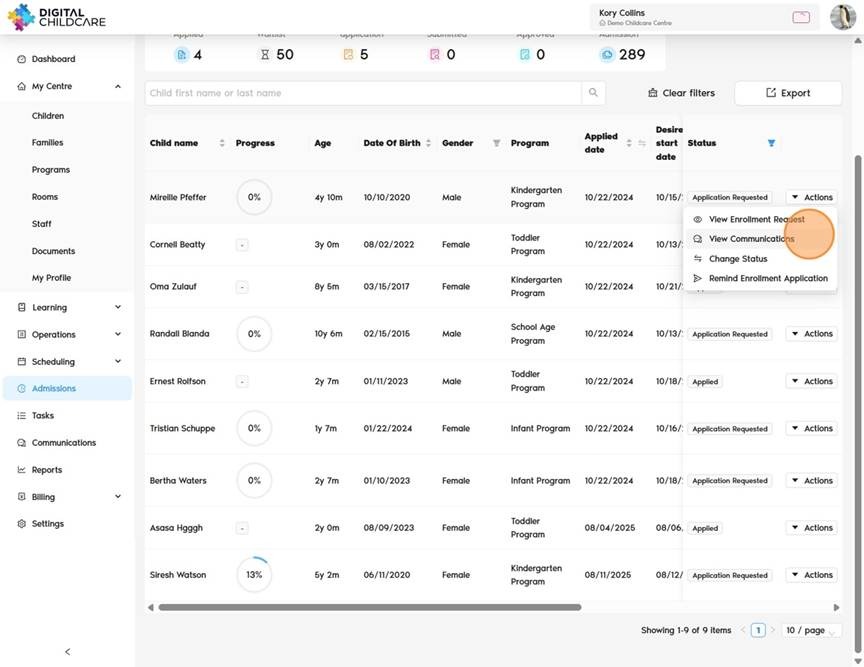
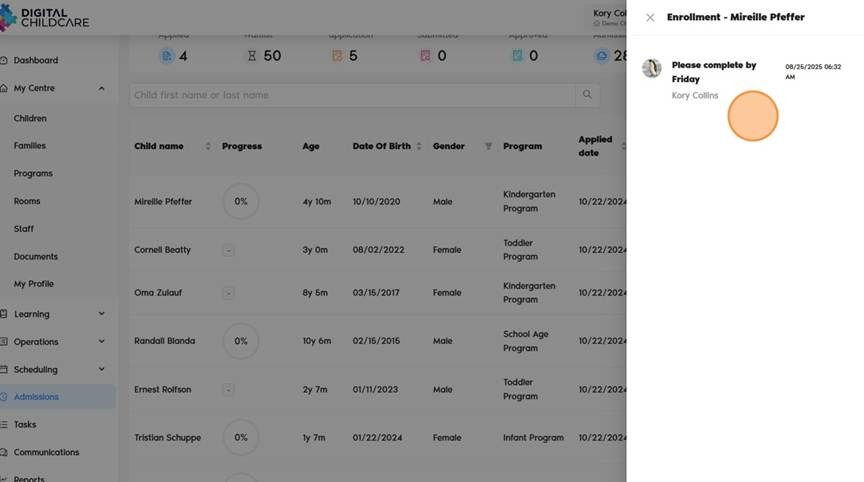
19. You can send and view communications about the enrollment package by clicking "View Communications."
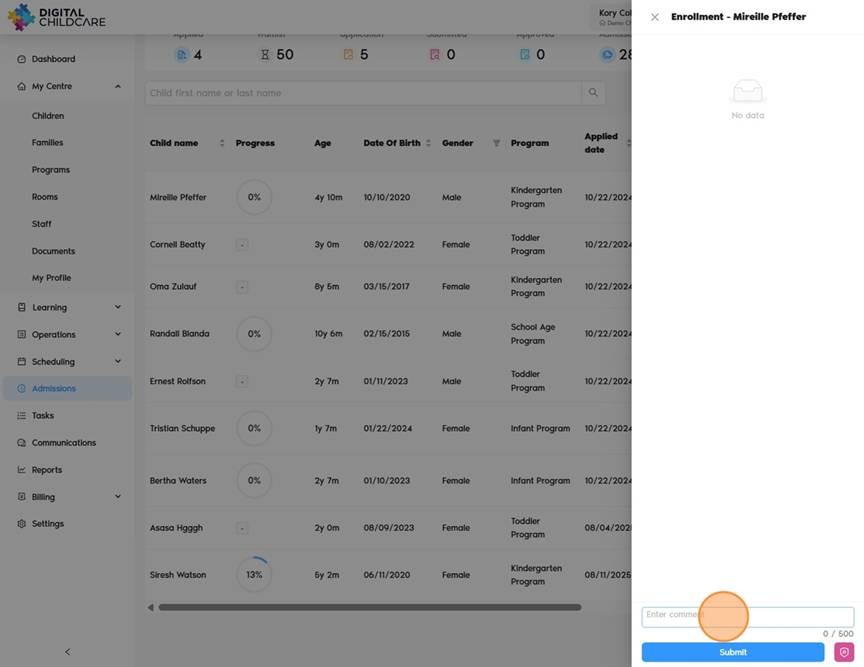
20. Click the "Enter comment" field. Then click "Submit"
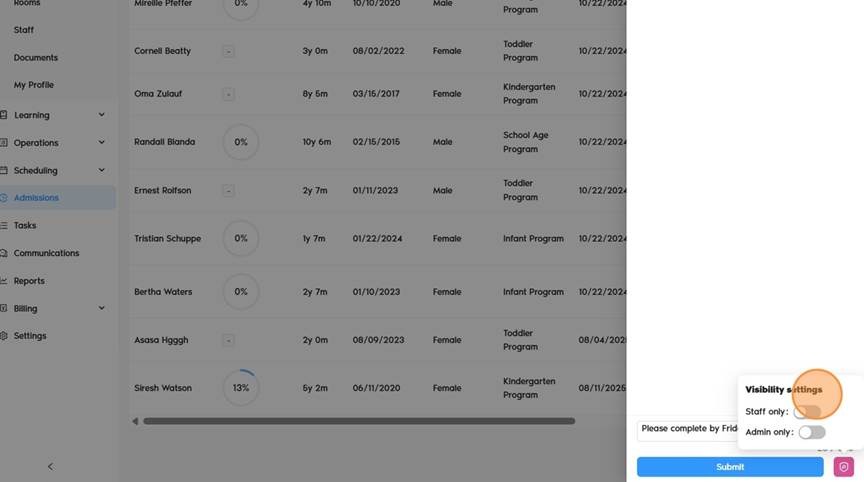
21. When you click the pink shield icon, you can create internal communication for admins or educators. If no selections are made, the communication will be visible to parents, admins, and educators.
22. You can view all communications.
23. You can remind families to complete the enrollment package without manually sending an email. Simply click "Remind Enrollment Application" and an email will be sent automatically.
⚠️ Alert: If you don’t see "Applied," it means the family has created a waitlist request on their portal. Please guide them to:
Waitlist (on the left panel) → click "New Waitlist Request" → complete the required information → click Submit.
Was this article helpful?
That’s Great!
Thank you for your feedback
Sorry! We couldn't be helpful
Thank you for your feedback
Feedback sent
We appreciate your effort and will try to fix the article